
What Are Common Plastering Mistakes?

Published by Adeel Virk
Adeel is a founder & project manager at Virk Construction Management, delivering ethical, high-quality residential and commercial projects in NSW and Canberra.
Look, plastering seems simple enough when you watch someone else do it. Slap some stuff on the wall, smooth it out, done. Right?
Yeah, not quite.
I have seen enough plastering disasters around Canberra and NSW to tell you that it's one of those jobs where small mistakes turn into big problems. Not always right away, either. Sometimes, weeks later, when you are trying to figure out why your wall looks like the surface of the moon.
So let's talk about what actually goes wrong. Not in some technical manual kind of way, but the real stuff that happens when people (professionals included) try to take shortcuts or just don't know better.
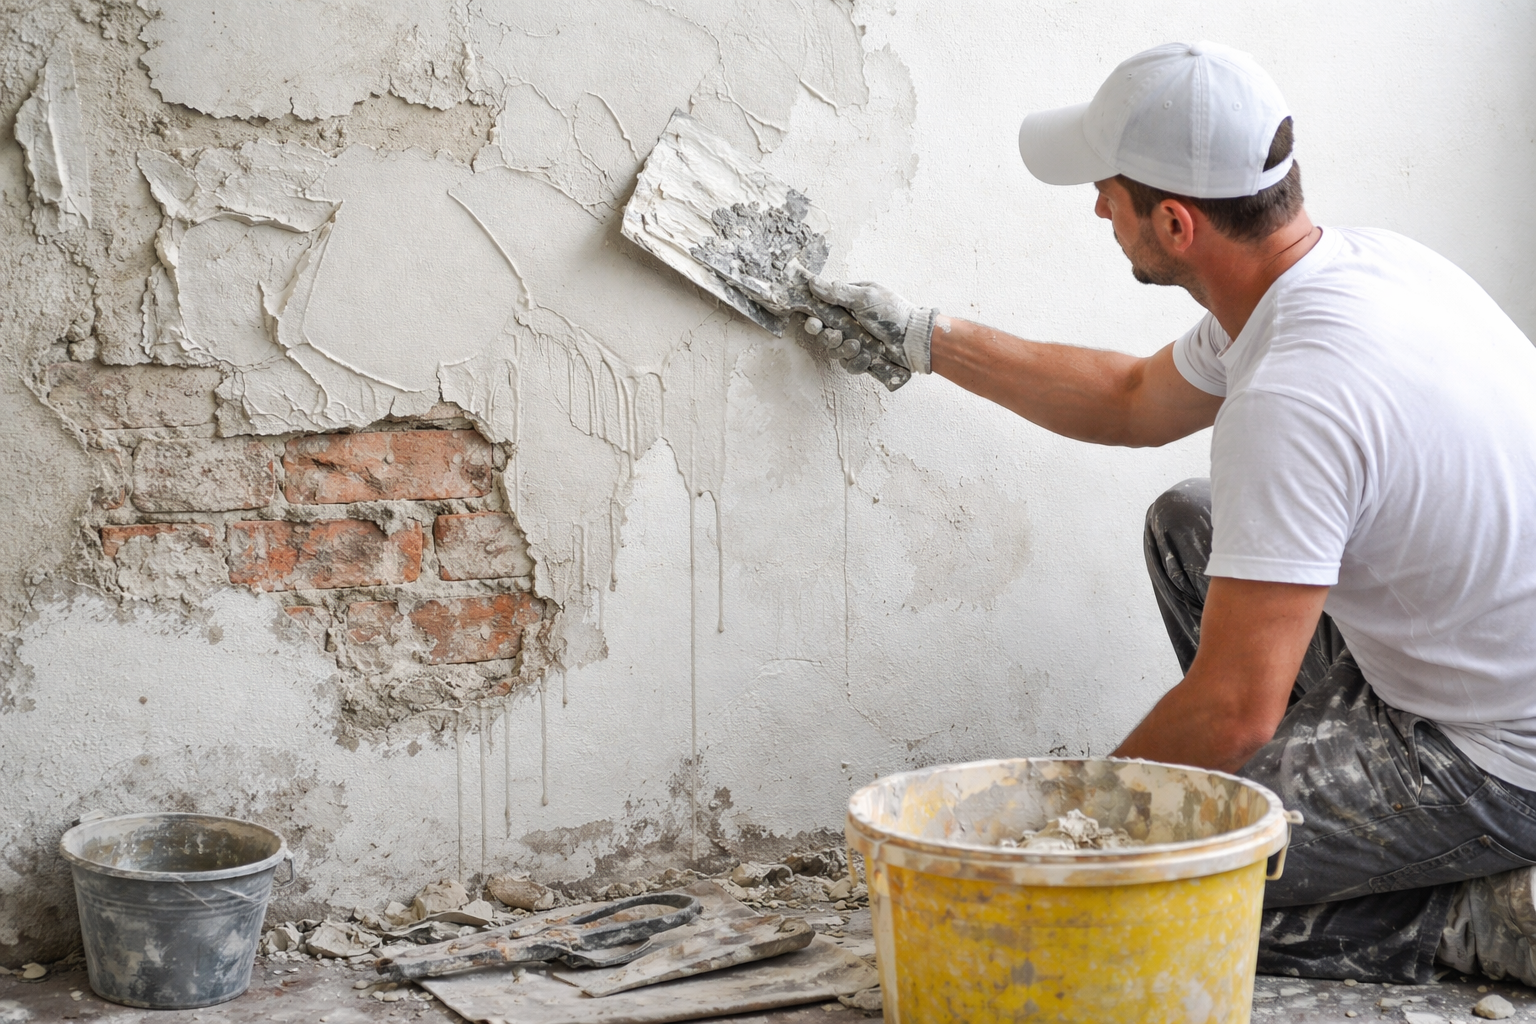
Not Prepping the Surface (Because Who Has Time, Right?)
Here's the thing everyone wants to skip: surface prep. I get it. You want to start plastering. The prep work is boring. It takes forever. But here's what happens when you skip it.
That dust on your wall? It's stopping the plaster from actually bonding. Those loose bits of old paint? They are going to come off eventually, taking your new plaster with them. That slightly damp patch you decided to ignore? Well, now you've sealed moisture into your wall, and it's going to cause problems you really don't want to deal with.
Proper prep means cleaning everything. And I mean everything. Dust, grease, loose material, all of it needs to go. Around here in ACT, we get a fair bit of dust (especially during those dry stretches), so this step matters even more than you'd think.
You also need to check for structural issues. Cracks aren't just cosmetic. Sometimes they are telling you something's moving underneath, and if you plaster over that without fixing it first, you are just creating a prettier version of the same problem.
Read More: Stage 4 Construction Process
The Moisture Problem
This is big in our area. NSW gets its share of rain, and Canberra's weather can be all over the place. If your wall is damp, stop. Just stop. Let it dry out completely. Using a moisture meter isn't being paranoid, it's being smart. Plaster needs a dry surface to cure properly. Apply it to a damp wall, and you are basically guaranteeing yourself mold, poor adhesion, and a wall that'll need redoing in a year or two.
Getting the Mix Wrong
Okay, so mixing plaster should be straightforward. Water, powder, mix. But people mess this up constantly.
Too much water and your plaster is going to be weak. It'll take forever to dry, it might sag, and the finished surface will be soft and prone to damage. Too little water and it's going to be impossible to work with. It'll set too fast, you'll get lumps, and you'll be fighting with it the entire time.
The instructions on the bag exist for a reason. They are not suggestions. They are based on how that specific plaster actually works. Different products have different requirements. What worked for one brand might not work for another.
And here's something people don't think about: water temperature matters. In Canberra's winter, when it's cold, that cold water is going to slow down your setting time. In summer, when it's hot, things set faster. You need to adjust accordingly.
Read More: Weather Delays on Construction
The Mixing Process Itself
Don't just dump powder into water and go at it with a drill mixer at full speed. That's how you get air bubbles throughout your mix, which then become weak spots in your wall.
Add powder to water gradually. Mix at a steady, controlled speed. Let it sit for a minute (this is called slaking, and yes, it matters), then give it another quick mix. This gives you a smooth, consistent plaster without all those air pockets.
Rushing the Application
This is probably the biggest mistake I see. Plastering is not a race.
When you apply plaster too thickly in one go, bad things happen. It can't be cured properly. The weight can cause it to sag or even fall off the wall. You get shrinkage cracks. The surface doesn't set evenly. It's just a mess.
Multiple thin coats beat one thick coat every single time. Yeah, it takes longer. Yeah, you have to wait between coats. But the finished result is actually going to last.
And speaking of waiting between coats, you have to actually let each coat dry before applying the next one. I know you want to finish the job today. But if you don't let that first coat set properly, you are just building problems on top of problems. The weight of the wet plaster on top will affect what's underneath. You might get delamination where the coats separate from each other.
The Pressure Problem
How hard you press matters, too. Press too hard and you are compressing the plaster unevenly, pushing out the moisture, creating weak spots. Too light and you are not getting proper adhesion.
It's a feel thing, honestly. You kind of have to develop it over time. But the basic rule is consistent pressure throughout each stroke. Not pushing harder when you hit a rough spot, not easing up when you are tired.
Ignoring the Weather (It's Australia, Come On)
Around Canberra and NSW, we get weather that ranges from cold to seriously hot. Both extremes mess with plastering.
Cold weather slows everything down. Your plaster takes longer to set, which sounds convenient until you realize that longer setting time means more opportunity for problems. Frost can actually damage fresh plaster. Below 5°C, most plaster products just don't work properly at all.
Hot weather is the opposite problem. Everything sets too fast. You are racing against the clock. The plaster can dry out before it's properly cured, which makes it weaker. You might get surface crazing – those little hairline cracks that spread across the surface.
In hot conditions, you need to work faster (but not sloppier), keep your materials cool if possible, and sometimes dampen the surface before applying plaster. In cold conditions, you might need heating, and you definitely need to allow extra time for curing.
Ventilation and Humidity
Plastering in a closed-up room with no airflow is asking for trouble. But opening all the windows on a windy day can cause the plaster to dry too fast. You need air circulation without creating a wind tunnel.
Humidity plays a role, too. Really humid days can slow down drying times. Really dry days speed them up. You can't control the weather, but you can adjust your approach based on what it's doing.
Using the Wrong Tools (or Using Them Wrong)
A plasterer's trowel isn't just a random flat thing. The size matters. The flexibility matters. The angle you hold it at matters.
Using a trowel that's too small means more passes to cover the same area, which creates more opportunities for inconsistency. Too large and you can't control it properly in tight spaces.
Dirty tools leave marks and contamination in your plaster. Old, worn tools don't work as smoothly and can actually damage the surface as you are working.
And those cheap plastic mixing paddles? They don't mix as thoroughly as proper metal ones. Yeah, they're easier to clean, but they're not doing the job as well.
The Hawk
If you are not using a hawk properly (or not using one at all), you're making the job harder than it needs to be. Constantly bending down to scoop plaster from a bucket, dripping it everywhere, getting inconsistent amounts on your trowel – all of this affects the quality of your work.
Not Knowing When to Stop
There's this thing that happens where people want to keep perfecting the surface. They keep going over it, adding a bit more plaster here, smoothing that spot there. And every time they do, they are messing with plaster that's starting to set.
Once plaster starts going off, leave it alone. Working over partially set plaster damages the surface. You'll get trowel marks that won't smooth out. You might pull the plaster away from the wall. You create weak spots.
There's a window where the plaster is workable. Learn to recognize when that window is closing, and stop. You can always sand minor imperfections later. You can't fix a surface you've overworked without starting completely over.
Skipping the Primer (Especially on Certain Surfaces)
Different surfaces need different preparation. Concrete, brick, plasterboard, painted surfaces – they all interact with plaster differently.
High-suction surfaces (like really dry brick or old plaster) will suck the moisture out of your new plaster too fast. You need to seal them first with a primer or PVA solution. Otherwise, your plaster dries unevenly, loses strength, and might not bond properly.
Low-suction surfaces (like painted walls or dense concrete) don't absorb much at all. Your plaster might just sit on top without really bonding. Again, you need the right primer to create a surface the plaster can actually grip onto.
Around Canberra and NSW, a lot of houses have that really old, dense brick. Without proper priming, your plaster isn't going to stick the way you need it to.
The Thickness Trap
Each type of plaster has a maximum recommended thickness per coat. This isn't arbitrary. It's based on how that plaster behaves as it cures.
Go too thick and the outside sets before the inside does. This creates stress in the material. You get shrinkage cracks. The plaster might sound hollow when you tap it because it's not properly bonded throughout its depth.
If you need thickness for leveling, build it up in multiple coats. Let each one cure. It takes longer, but the alternative is redoing the whole thing when it fails.
Not Mixing Enough Material (or Mixing Too Much)
This seems minor but it causes real problems. If you don't mix enough plaster, you run out mid-section. Then you have to mix more, but by the time you are back, the edge of what you've already applied is starting to set. Trying to blend new plaster into partially set plaster never looks good.
Mix too much and you're rushing to use it all before it goes off. You start taking shortcuts. The quality of your work drops.
Experience teaches you how much you need for a given area. Until you have that experience, it's better to mix smaller batches more frequently.
The Bottom Line
Plastering is one of those things where cutting corners just doesn't work. Every shortcut comes back to bite you. Maybe not today, maybe not next week, but eventually.
The good news? Most of these mistakes are completely preventable. They're not about skill level. They are about patience, preparation, and understanding what you are actually doing.
If you're in Canberra, ACT, or NSW and you're looking at a plastering job – whether it's DIY or hiring someone – knowing these common mistakes helps you either avoid them yourself or spot when someone else is making them.
At Virk Construction Management, we've seen all of these mistakes (and fixed them). The ones that take the longest to fix are always the ones where someone tried to rush or skip steps to save time. Turns out, doing it right the first time is always faster than doing it twice.
So yeah. Take your time. Prep properly. Don't fight the weather. Use the right tools and materials. Stop when you should stop. It's not complicated, but it does require actually following through on each step.
Your walls will thank you. And more importantly, you won't be calling someone to fix it six months from now.